Account Setup
Account Setup allows users to set up account elements and lengths, set up templates for new accounts, and add or delete account categories.
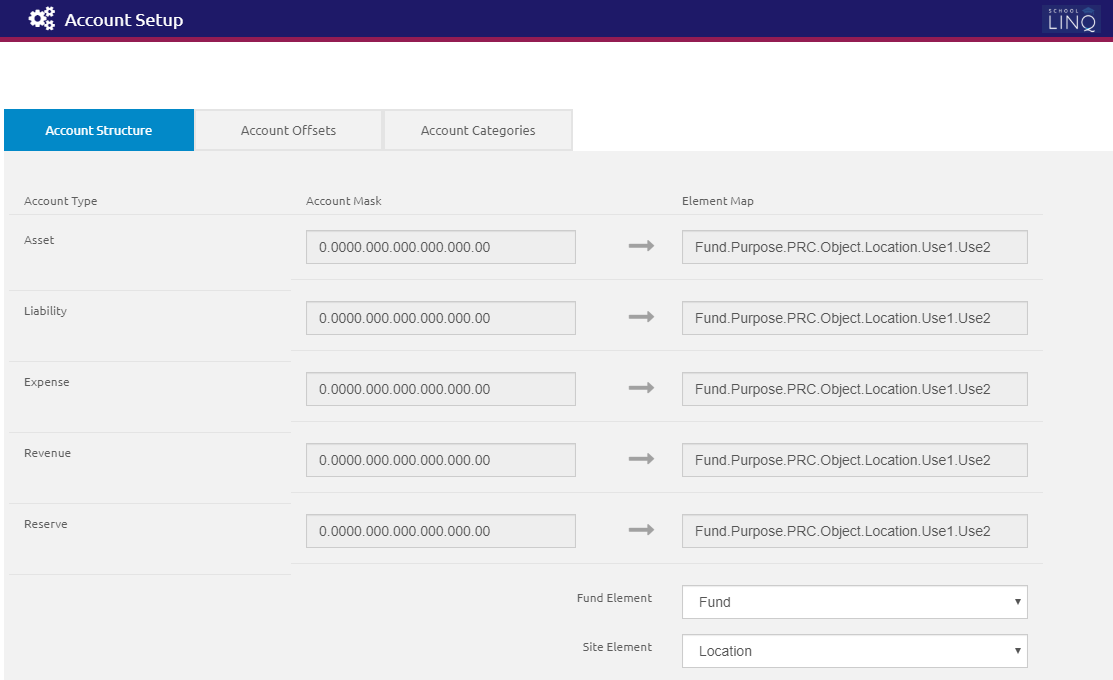
Account Structure Tab
This tab allows users to set up the account elements and lengths. Account structures cannot be changed if any account history exists.
- FUND is the first digit (1-9) of the account code. Fund 0 may also be used, for school-level accounting only. User-defined can be any length (up to 32 digits).
- FUND is a required element for all user-defined formats. It can be any length and in any position. An element must be defined as the FUND, but it does not need to be called FUND.
- Click the
 button.
Account Offsets Tab
This tab allows users to set up templates that are used when new accounts are added. This is used in Fund Management Accounts to provide default offset accounts for every account. This simplifies data entry for standardized accounts.
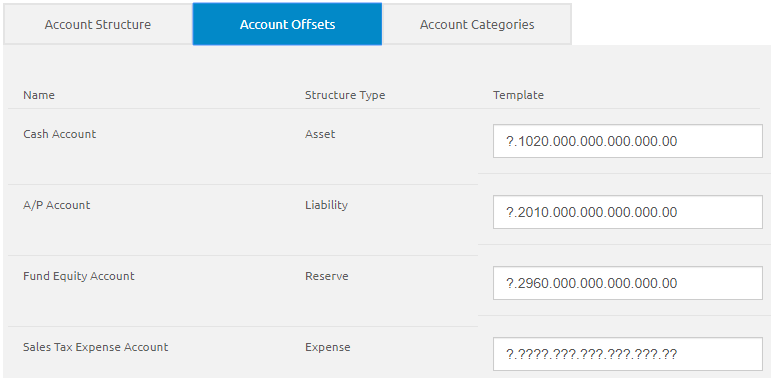
- Enter the account numbers for the Templates provided. This is optional.
- The system will fill in the same digit as used in the account number wherever question marks exist in the template. Example: If you are setting up expense account number 1.5110.061.414.000.000.00, it will use 1.1010.000.000.000.00 for the cash account and 1.2010.000.000.000.00 for Accounts Payable, and so forth.
- You can always override the default values if there are exceptions to the standard.
- The templates can be changed at any time, but changes will not affect existing accounts.
- Click the button.
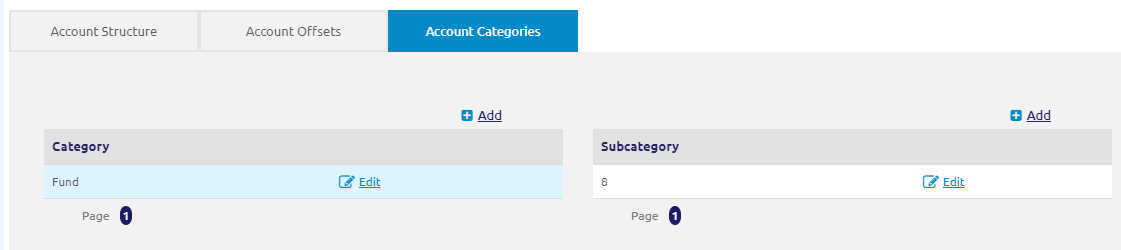
Account Categories Tab
This tab allows users to add and delete account categories. Each category is tied to a single account type. In Manage Accounts, these categories and subcategories can then be assigned to specific accounts.
Add Category
- Click the
.png) link. The Add Account Category window will display.
link. The Add Account Category window will display. - Enter a description in the Description field.
- Click the
 button.
Add Subcategory
- Click the link. The Add Account Subcategory window will display.
- Enter a description in the Description field.
- Click the button.
©2021 | EMS LINQ, Inc.
School LINQ Help, updated 01/2021